Why DSLR’s Using Continuous Lighting Have Exposure Problems

29 12 2012

I’m often asked when we will be putting out a diffuser for LED Continuous Light Units.  The answer to that is, the problem with your images may have issues that have nothing to do with diffusion.  It’s the nature of continuous light sources.  They do not have metering!

If you have a continuous light source, when your subject moves closer to the light, of course your subject will be brighter.  To compensate for that, your DSLR will typically meter on your subject’s face, therefore it will instantly increase the shutter speed or close the aperture to make sure the face isn’t blown out.  When the camera does this, the background becomes dark.  That’s because the difference in the mixture of your continuous light and the background is greater.

Using continuous lighting is therefore preferable for subjects that do not move (as in, portraiture).  Additionally, the color temperature of your light will typically not match the background light.  You could use a warming, “tungsten” color filter, but when the camera’s auto white balance corrects the color temperature in, say, auto white balance, the entire image will look neutral balanced, or like it was taken outdoors on a cloudy day.  This will then no longer look like an indoor image.

This is the reason flash units are used by professionals.  Reason 1) TTL metering and the ability to “mix” your available light with your flash pop, 2) auto white balance using flash will produce a midway color temperature between the incandescent tungsten and your subject.



Quick, Easy and Cheap Off-Camera Flash Setup

28 12 2012

I just had a person write me and ask – what do I do to set up my flash off-camera?  Specifically what do I buy?  What hardware do I get?  Well it’s always my pleasure to help.  So here you go!


How Brick And Mortar Camera Stores Can Thrive

27 12 2012

photo industry reporter

This is my interview with Photo Industry Reporter.  Part of my job is to support our retailers, and this has brought me around the world with a unique perspective of camera retailing.  Not only am I a photographer, I am a photographic supplier with my line in thousands of stores worldwide.

Most importantly, I’m a consumer.  And I am a person who bought a cheese grater at a county fair when I don’t even cook.  I never used it, but I had to have it.  Read the article for more – click here


The Eagle Snatching Baby Video – How You Can Tell It’s A Hoax

20 12 2012

These guys were brilliant! It really looks like an eyewitness video, with the uneven handheld panning, the comments and the camera reaction of them running to see if the baby was ok. But the one thing they missed was the shadows. Between six frames, the angle of the sun changes from behind the lens and over the right shoulder to the left of the lens.

Using the shadows, you can tell which objects were animated creations, and which were really at the park. Still it’s a brilliant video:

eagle2

And here’s the viral YouTube that has gotten over 10 million hits overnight:


How To Fix Underexposure In Snow

15 12 2012

Hi from Gary –

I got a great question asking why shots taken in the snow look so “murky”. Winter photography is bathed in bright white, and cameras are designed to expose scenes to middle grey. Most imaging situations can be accurately metered by trying to get everything overall to be in the middle, between highest brightness and lowest darkness. When you are shooting in show, everything is nearer the bright end of the range.

New cameras that do “face tracking” do a pretty good job of making the snow white because it is exposing for the person’s face. Absent that, if you just take a photo of white snow, the camera doesn’t know it’s snow (some advanced point-and-shoot cameras actually have a “snow” mode!) so the snow will be grey.

Overriding your exposure is something that has to be done only in special situations. Overabundance of white in the scene would typically call for an intentional overexposure override (+1,+2). Conversely, overabundance of black in a scene should be treated with a (-1,-2) underexposure, because your camera may think that all of that black should be grey, which would way overexpose the faces.

Here’s a little video that shows how this all works:


From Paris – Salon De La Photo

14 12 2012

(Hi this is Gary)

This was a huge trade show. An estimated 80,000 people went through it, which is like six times the number of people that go to WPPI. Photography is huge in France, and the crowd is very different than the US. Everybody there is very knowledgeable about technical details, and most everybody there has been shooting for years.

So it was a pleasure to address a group that understood diverse advanced topics such as high speed sync, and synchro-flash techniques, and spoofing the camera with a false white balance.

This video is in French, and I’ll work on an english overdub. We have a loyal following in France and eastern Canada.


Two Flash Shoot At Palace Trianon Palais (English Overdub)

14 12 2012

This is the english translation of a shoot I did at Versailles, France. I wanted to show how much I could do with only two speedlight flashes with one lightstand, a radio trigger, and Gary Fong flash accessories including the Lightsphere Collapsible Snoot, and the color domes. The original video is below, and doesn’t look like a Kung Fu movie


How To Photograph Tabletop Products

13 12 2012

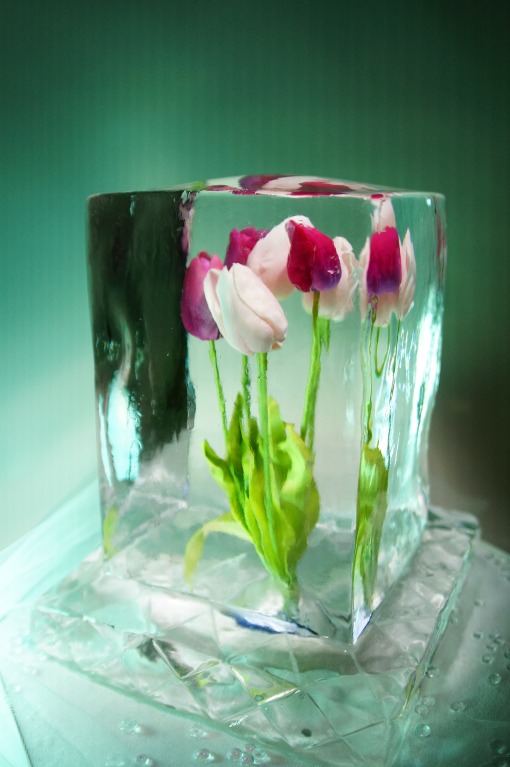
Lately, I’ve been pretty much dedicated to using only 2 flash units off camera for everything I do. So when my friend asked me to shoot her ice sculptures, I was thrilled because it gave me another YouTube video to add to the library!

The key part to shooting the flowers inside the ice was the PowerSnoot. Using it, I was able to direct the spot right on top of the flowers, giving them saturation and form. In the video, you’ll see the available light images compared with the ones I did with two flashes.

DSC05724


[youtube http://youtu.be/e4CIxr1L-Oo]


How To Self Publish Your Book On Amazon

13 12 2012

(Hi from Gary)

I’ve had a lot of people ask me how to get a book published, and I’ve done it both ways – through a traditional publisher and self-publishing.  So I made the following video.

In short, the benefits to self-publishing (for me) are 1) the book gets out fast.  My traditional publisher took about two years to finish the project, after having signed the book deal.  In self-publishing, I can get the book out literally in minutes.  Lastly, you have total creative control.  I’m thrilled how BenBella books handled my first book, but I was reserved about the title, “The Accidental Millionaire” (I wanted it to be the Accidental Entrepreneur, because of all of the random businesses I started on a weird whim).  But because they had the rights, it was theirs to title.

Writing a book is like writing one long ass blog post.  Authors often try to make the book “thick” or over 200 pages, etc.  I’d rather a book be 50 pages and knockout rather than fluff filler.  And once you have the words all typed, there is the editing – which makes or breaks your book.  I like to call the process “assembly” , where you tie all of the chapters together. Here’s the video: